This information helps protect your account from getting banned by Facebook.
- Open Business Settings
- This may ask you for the 2-Factor Authentication code, so prepare your phone and ensure it’s next to you for your convenience.
- On the left side of the screen, click on Business Info which you can find at the bottom left.
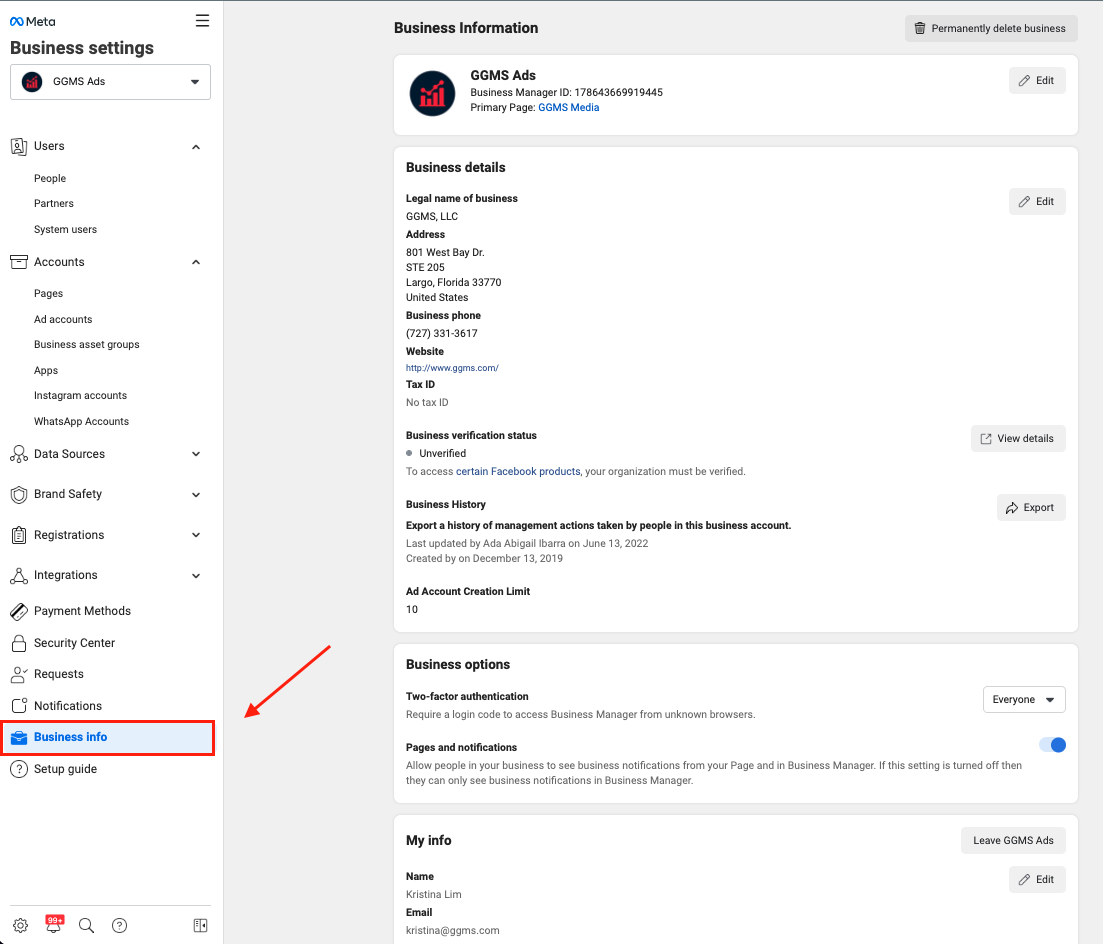
4. Once you’ve located the Business Info button, you should be able to see the Business Information section.
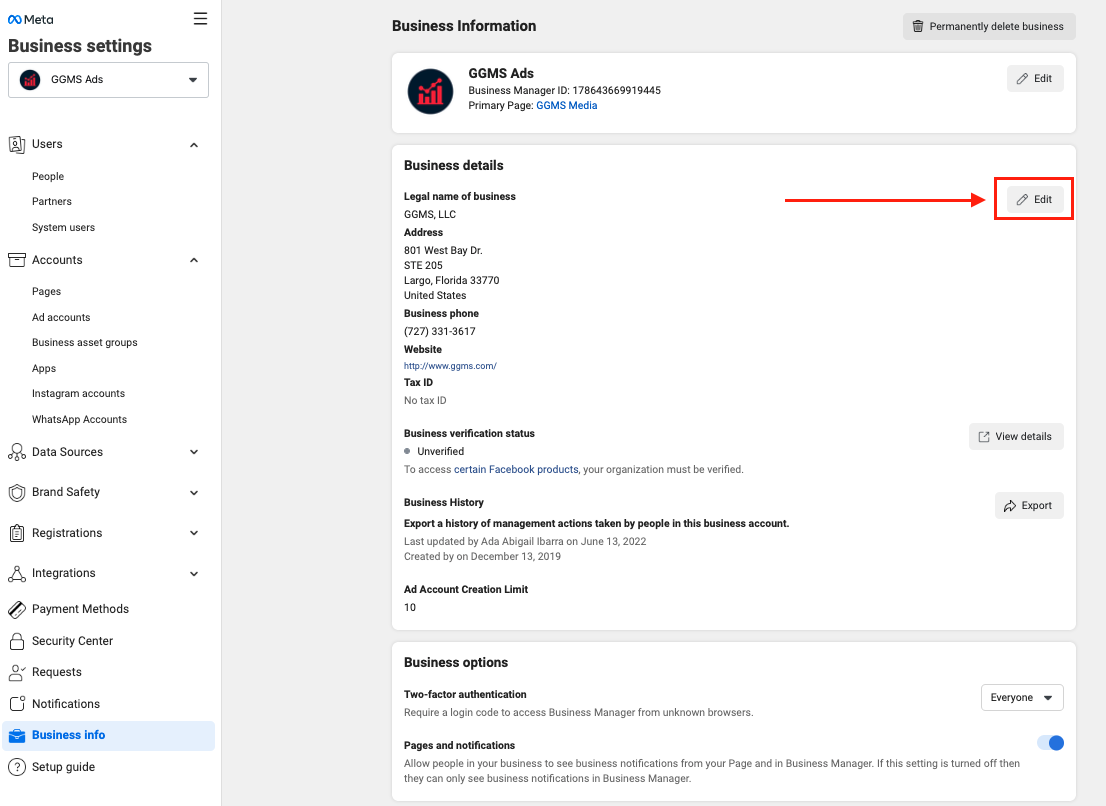
5. From there, you’ll see an Edit button. This will allow you to make necessary changes to your Business Information.
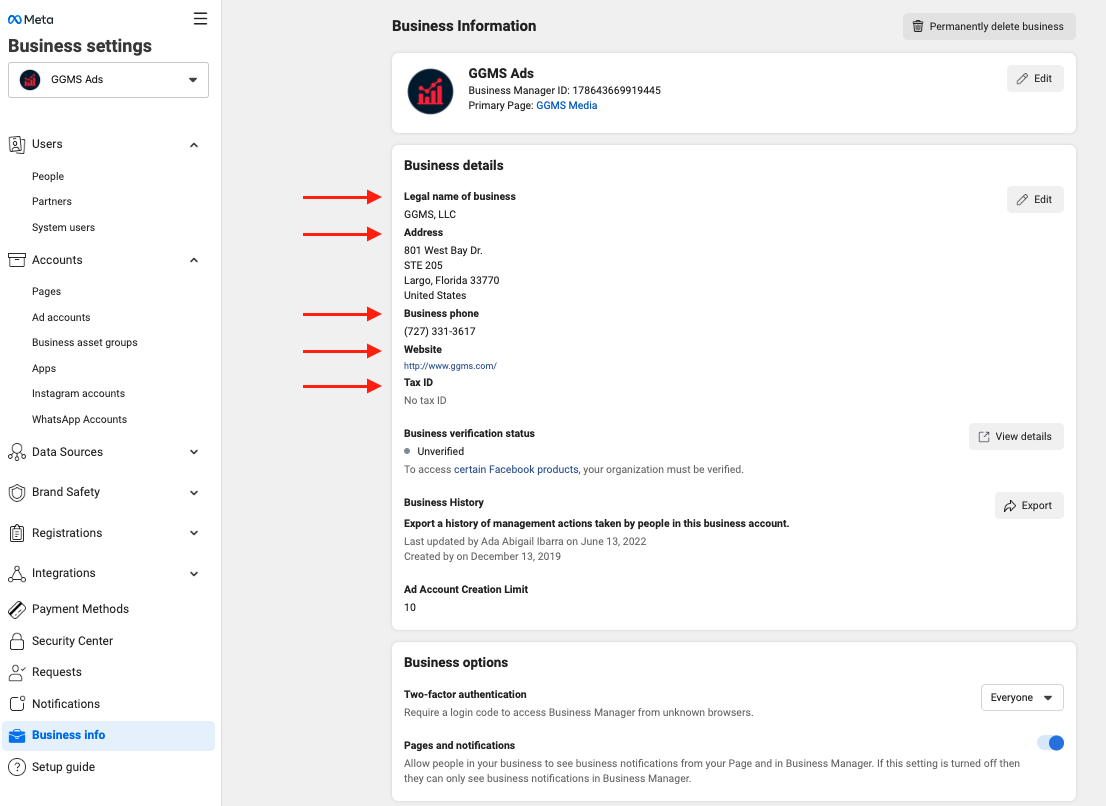
6. Make sure to fill in the following information:
- Legal Name of Business
- Address
- Business Phone
- Website
- Tax ID, if applicable
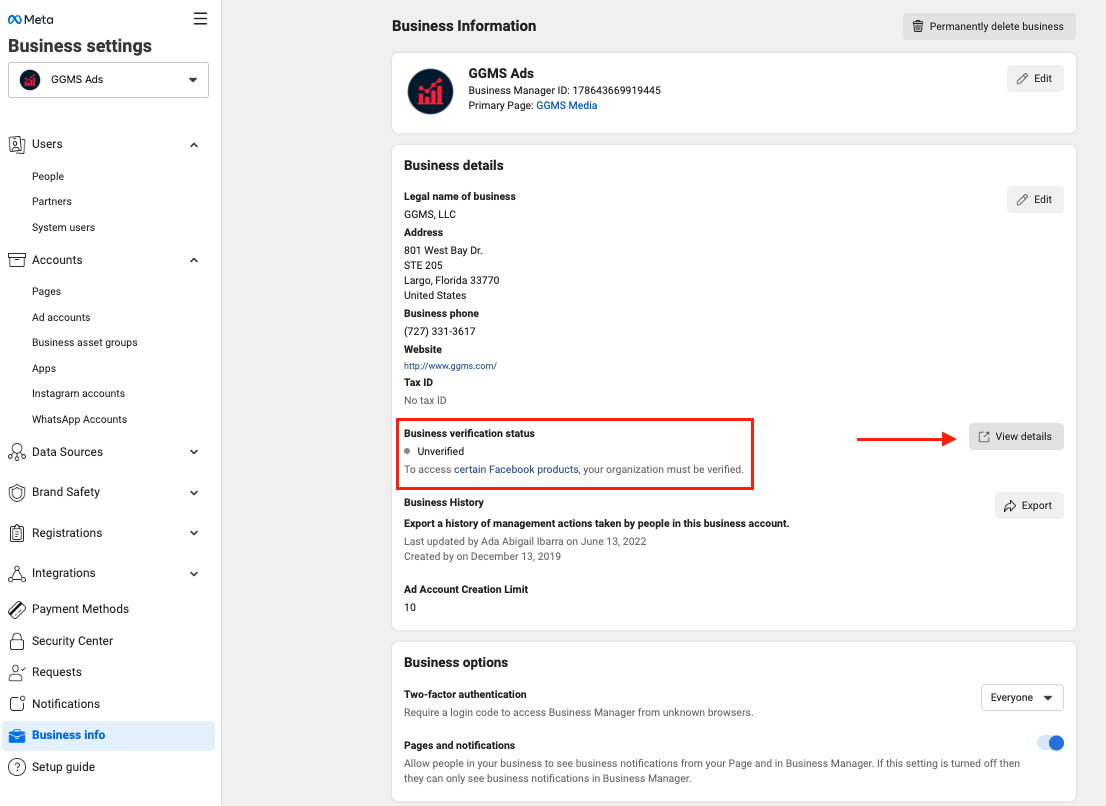
7. You also have the option to verify your Business through the Business verification status. Once you click on View Details, this will take you to Security Center. From there, you can start reviewing people’s access and adding another admin to help you get access to your account when you get locked out of it.
Note: This step is optional, and only some Business Managers are eligible to this feature.