This will guide you through the setup in SendGrid and integrate with Sierra Interactive.
SendGrid Setup
API Keys in SendGrid
Sierra Interactive
Sierra Interactive Video Resource
SendGrid Setup
- Login to Sendgrid
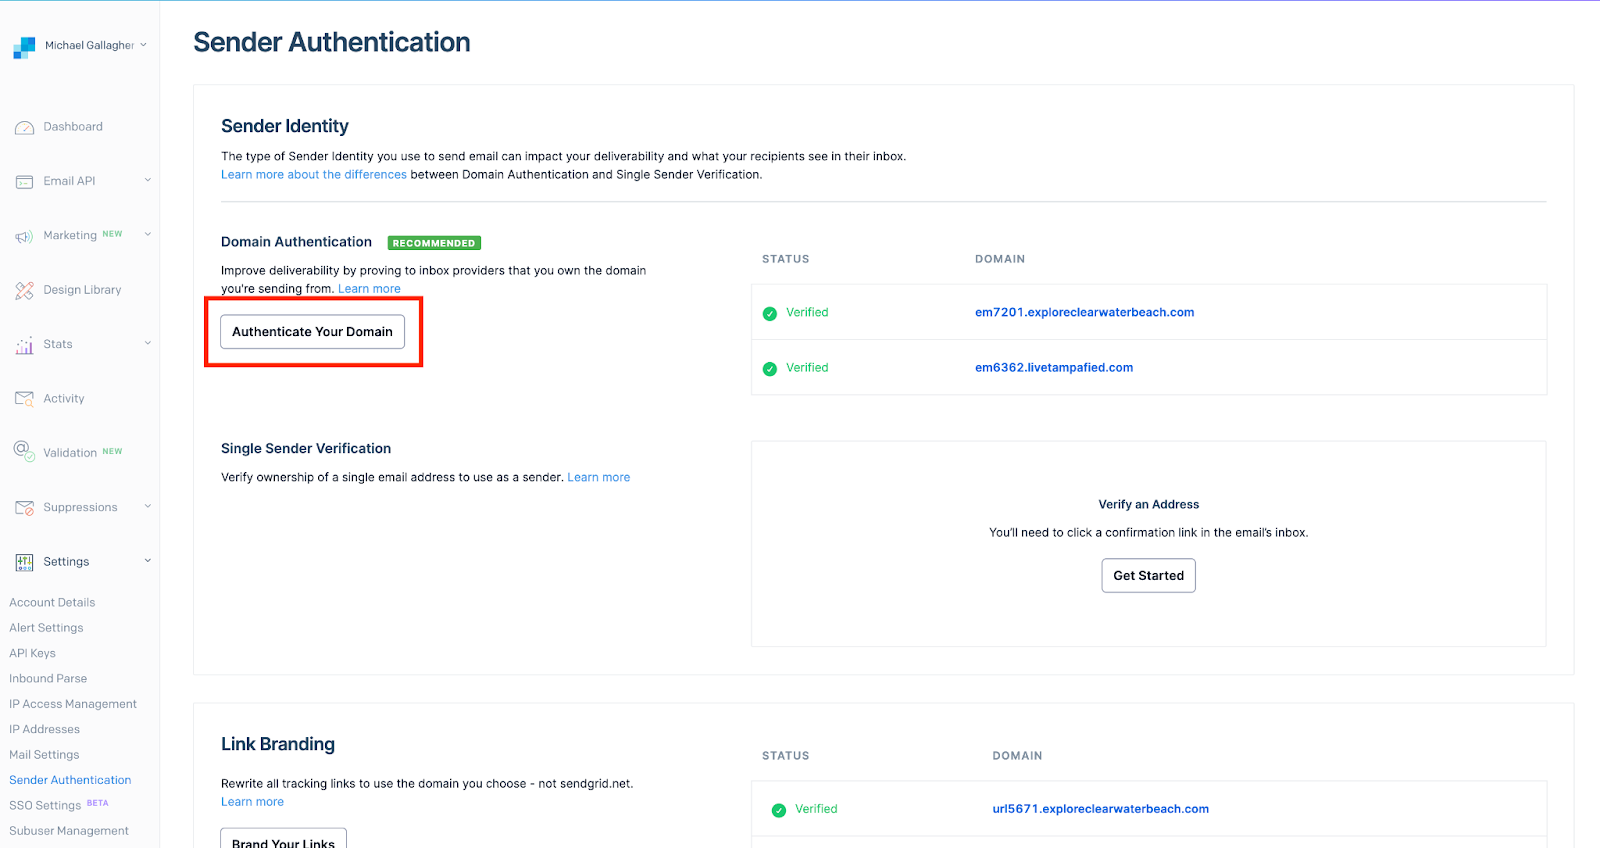
- Navigate to Settings > Sender Authentication
- We will then click “Authenticate Your Domain”.
- For number 1: If you are using a domain that Sierra Manages, you will want to select “Cloudflare” under DNS Host even if you own it elsewhere. For number 2: Select “Yes” and click next.
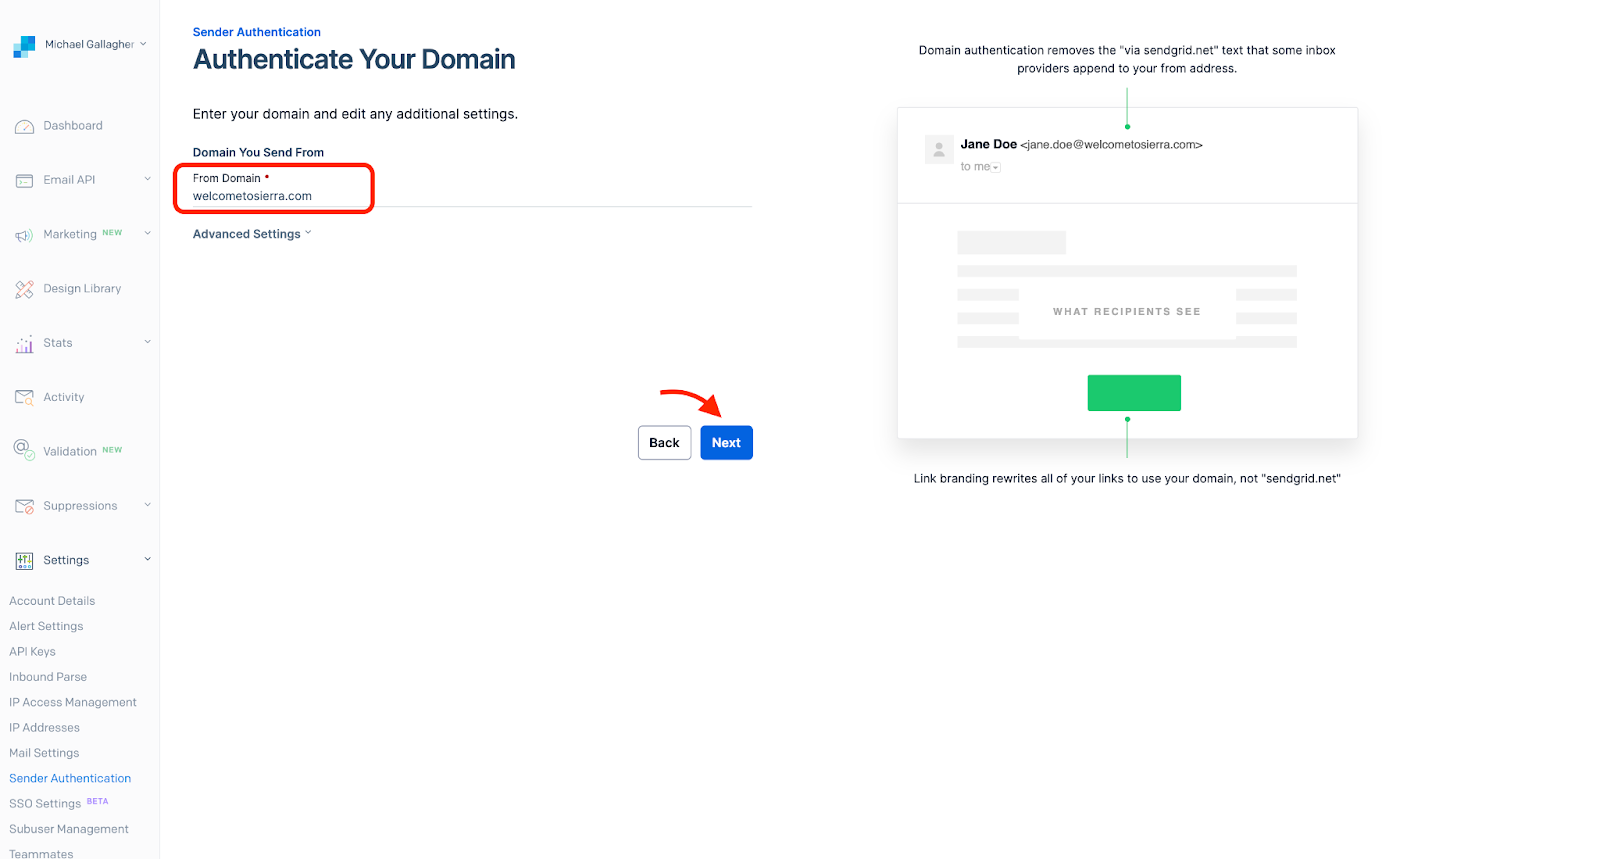
- Now you will want to enter your domain without “www” (ex: welcometosierra.com) and click “Next”
- Then select the Send to a Coworker tab and enter “support@sierrainteractive.com” in the To field. Then click Send.
- Once this is sent, they will respond with an email letting you know all the information that has been verified. If you send more than one, you will see an "em" with some numbers and a "url" with some numbers, and those will be included in the email as well.
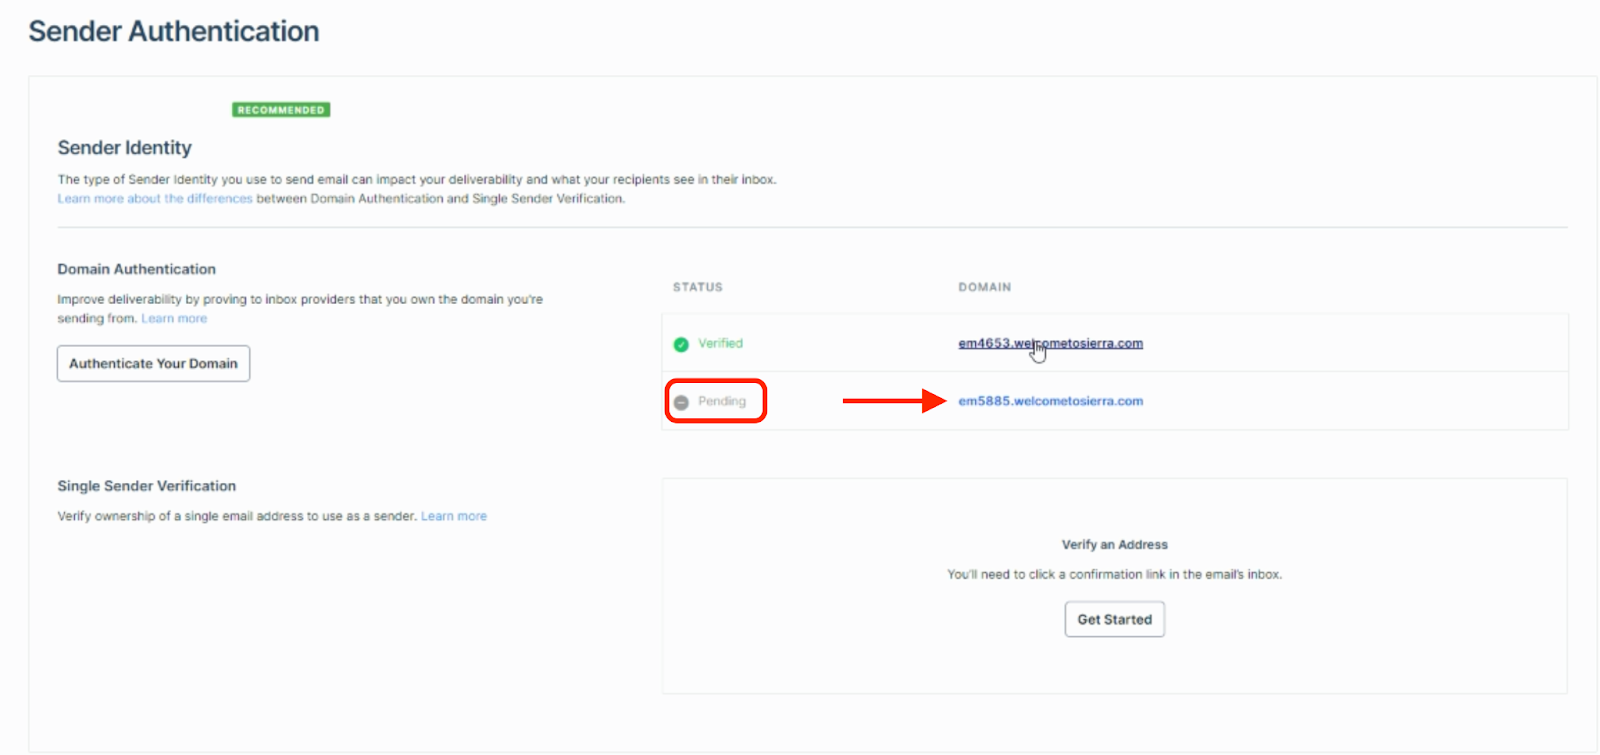
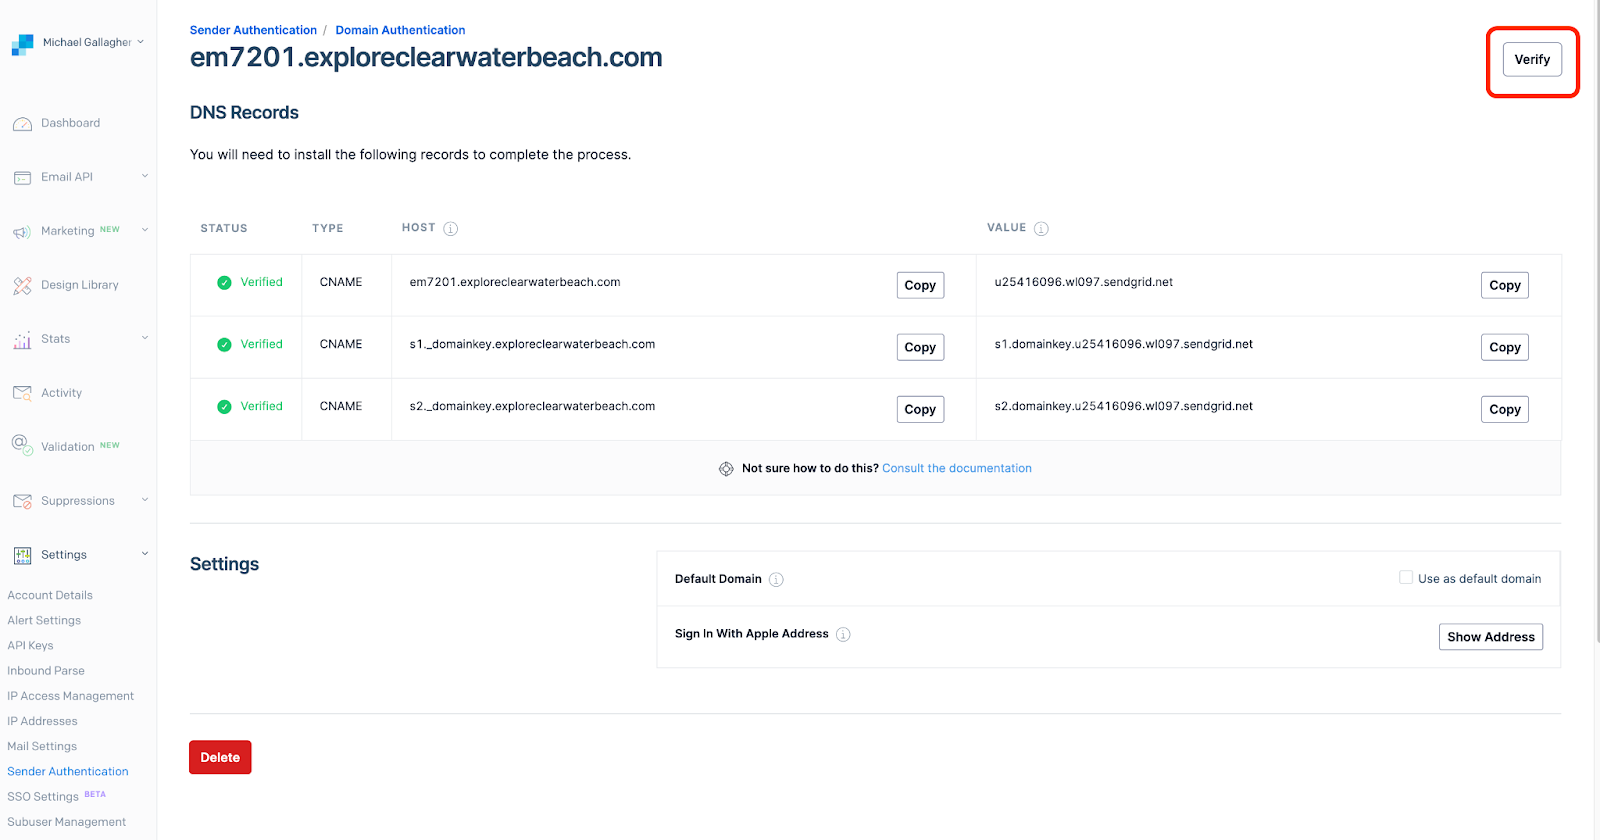
- On the Sender Authentication page, under “status” you will click on the domain that is “pending”. In the example below, you will see that we have one that is verified and one that is pending.
- Click Verify button at the top right of the page.
- You should then come to a page that says, “It worked!” and you can click the Return to Sender Authentication button.
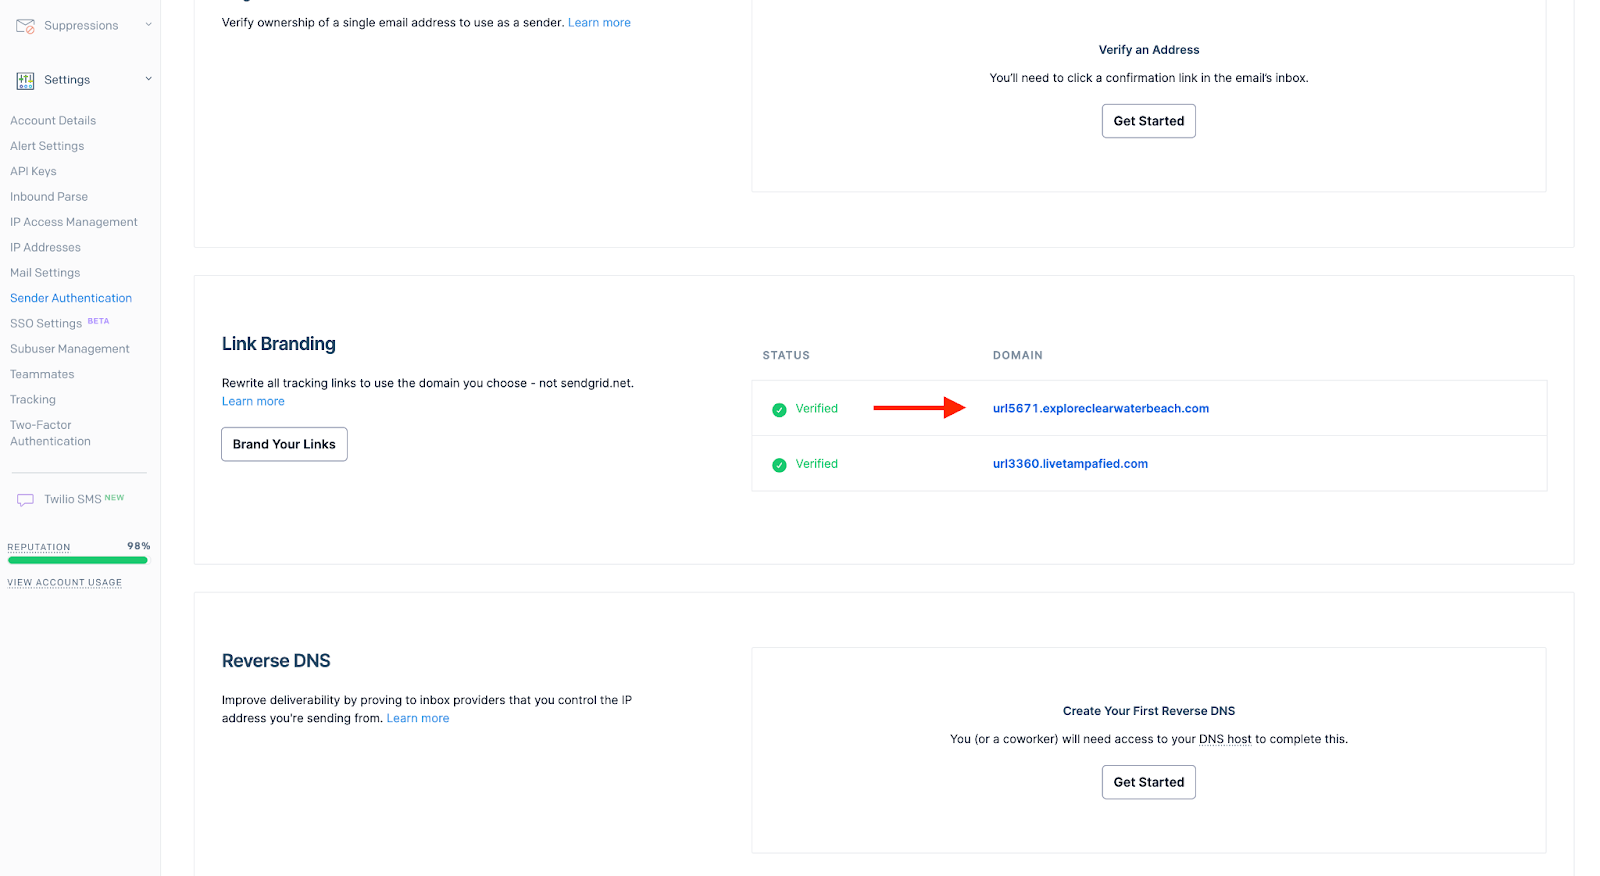
- On the Sender Authentication page, you will want to scroll down to Link Branding, and if the domain has not yet been verified (pending), click on the domain. Then click Verify at the top right of the screen, just like in the previous step.


API Keys in SendGrid
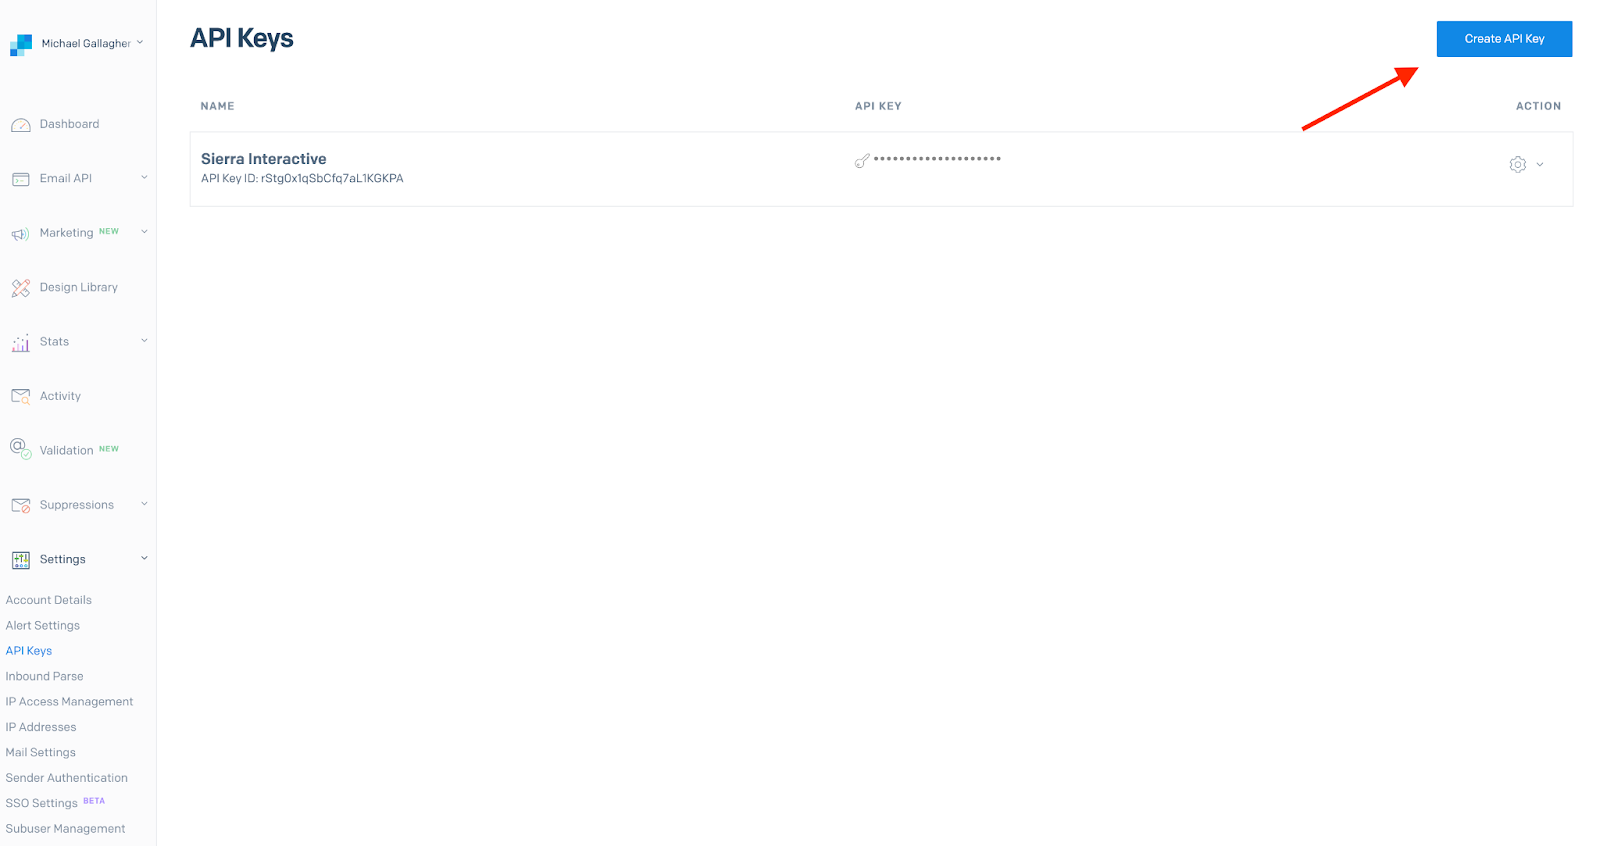
- After verifying your domain, you will navigate to Settings > API Keys
- Click the blue Create API Key button at the top right.
- Under API Key Name, you will enter whatever makes sense to you (we suggest Sierra Interactive or Sierra Keys) and select Full Access, then press the Create & View button.
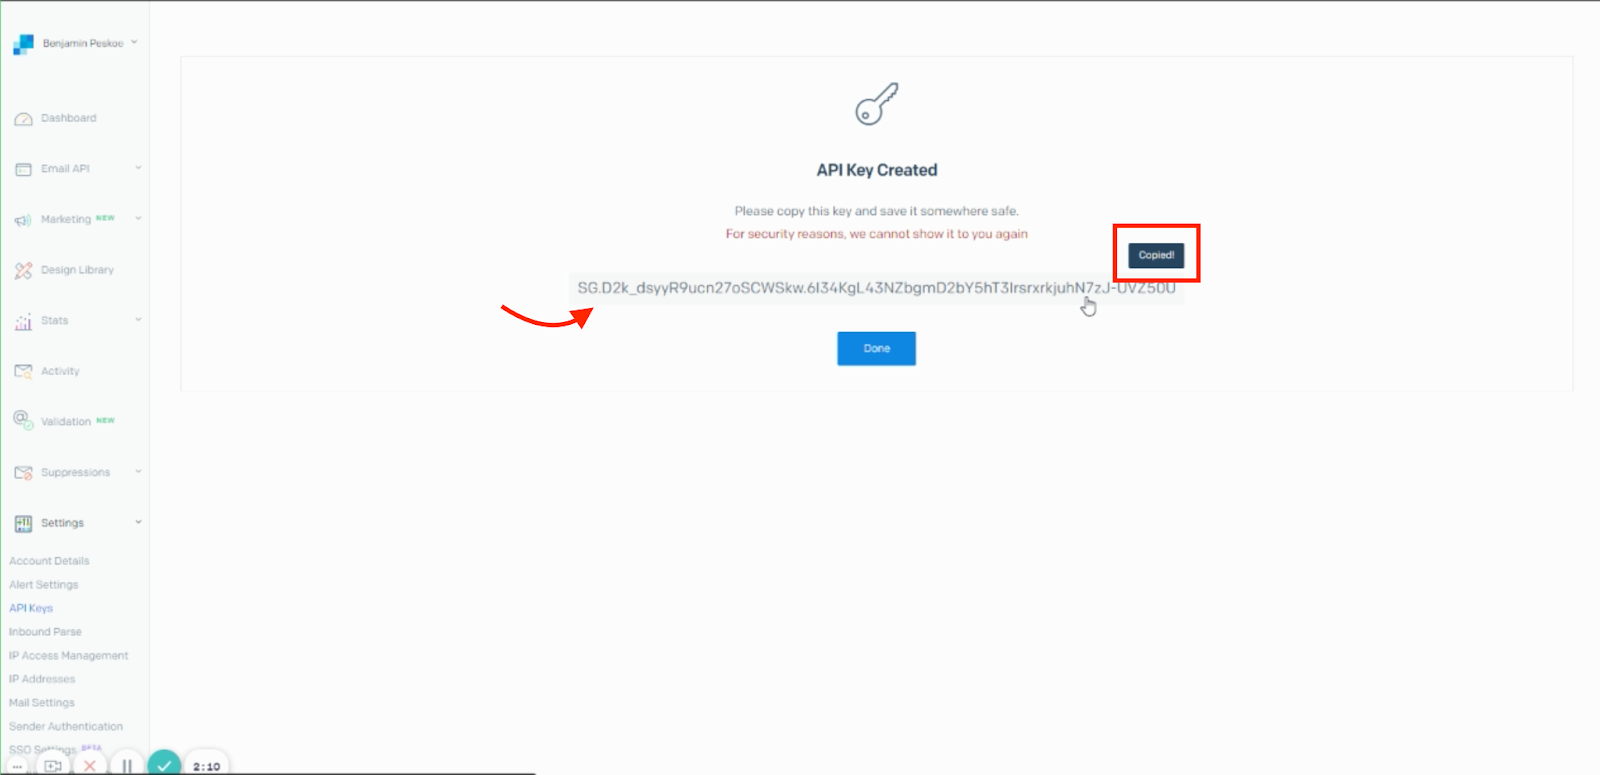
- Click the API key to copy it, and go ahead and store that key somewhere on your computer, as it will not show again.
- You will proceed to Sierra Interactive for the next steps using this API Key.


Sierra Interactive
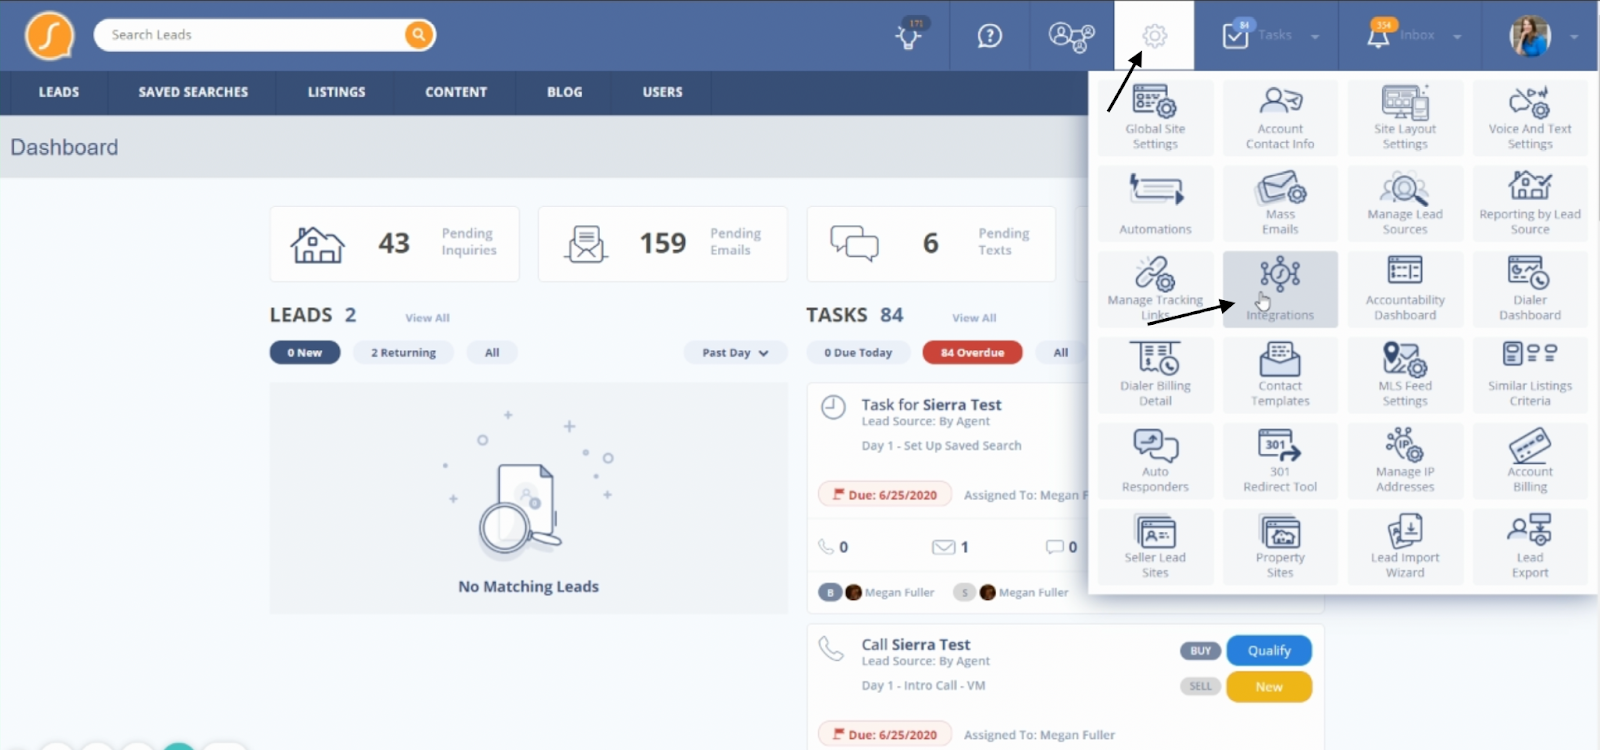
1. Next, you will need to log into your Sierra account with your credentials. Once in your account, navigate to the Settings icon and select Integrations (see below).
Log into Sierra > Select Settings > Select Integrations
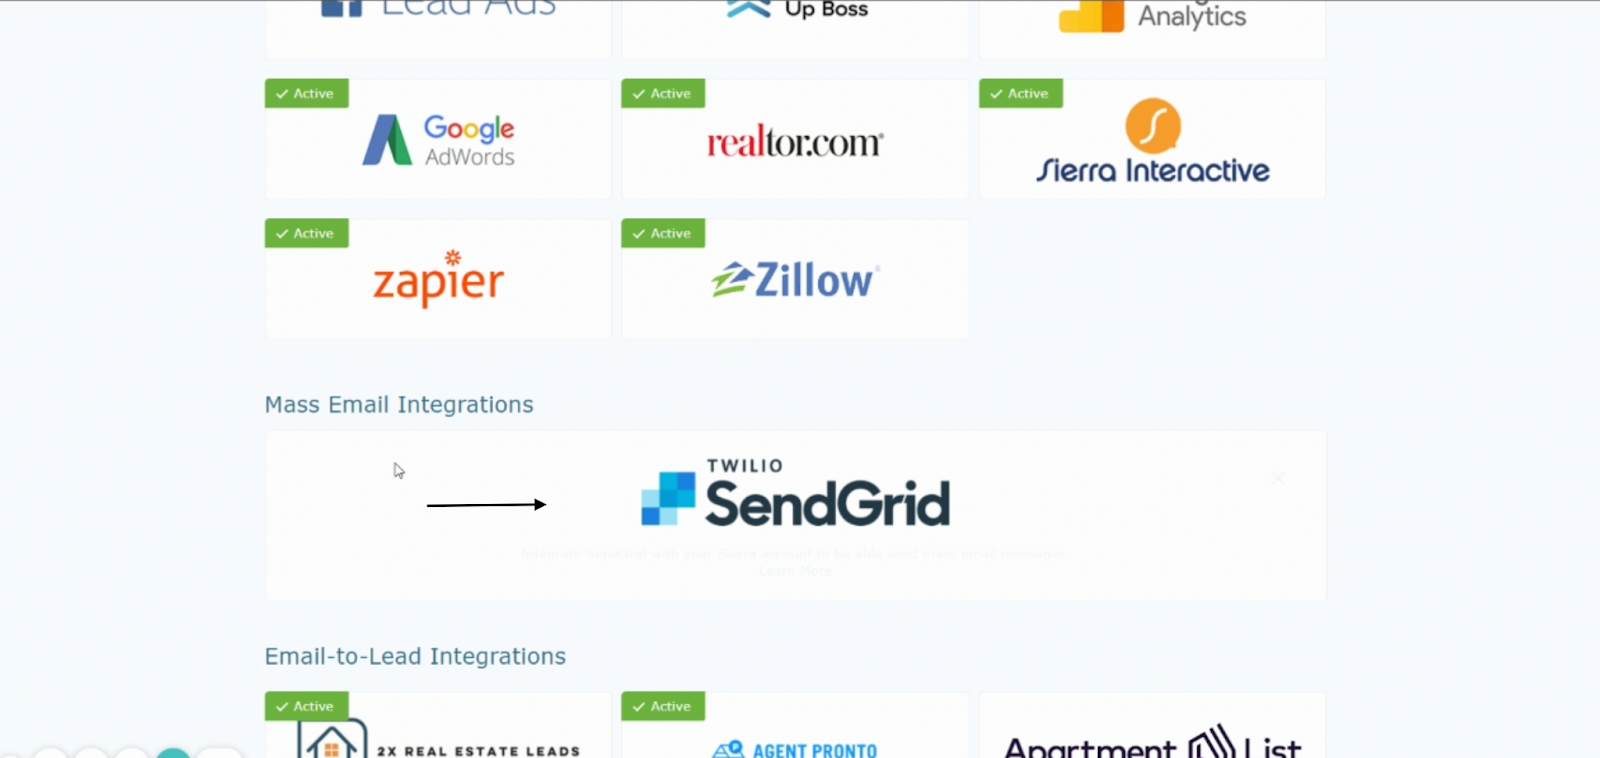
2. On the next page, scroll down until you see SendGrid and select (see below).
3. Once selected, paste your API Key in the field that appears. Once entered select “Validate API Key.
Enter your SendGrid API Key in the box below and press “Validate API Key” to advance.

4. Once it's been validated, you will need to add a prefix to your email (see below) and select Next.
5. Once on the next page, it's recommended that you switch the first toggle (Utilize for all marketing emails) to the ON position, as seen below, to ensure that your marketing email, action plans, drip campaigns, autoresponders, and bulk emails will use your SendGrid servers. This will help to warm up your account.

6. For the second (Utilize for All Listing Alerts), it's recommended that you turn this OFF, for at least 30 days so that the high volume of listing alerts does not ruin your reputation.
Once this is done, please select Connect.

7. After 30 days has commenced, you may come back to edit this information using the same steps as previously mentioned and update any toggles or email information, by selecting “Edit” as seen below.

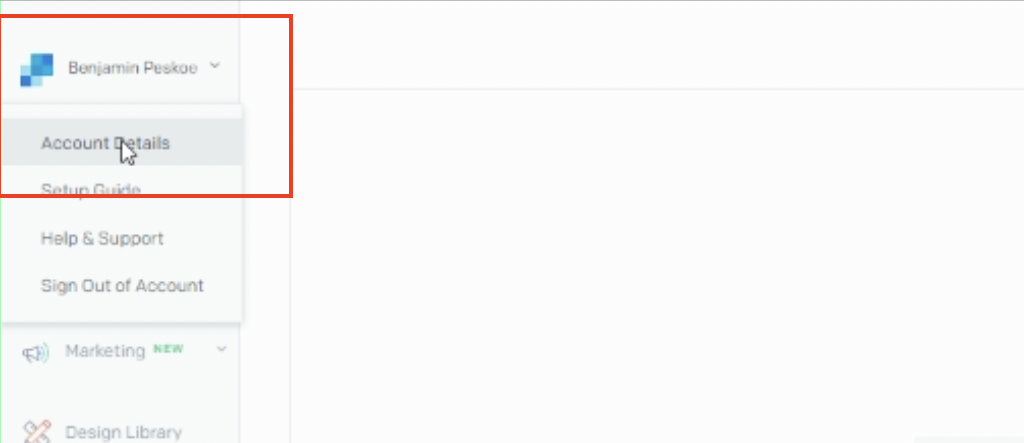
8. Once these steps have been completed, there is one final step. Back in SendGrid, select your name in the upper left corner of the screen (as seen below). Once your name is selected, now select Account Settings from the drop-down.
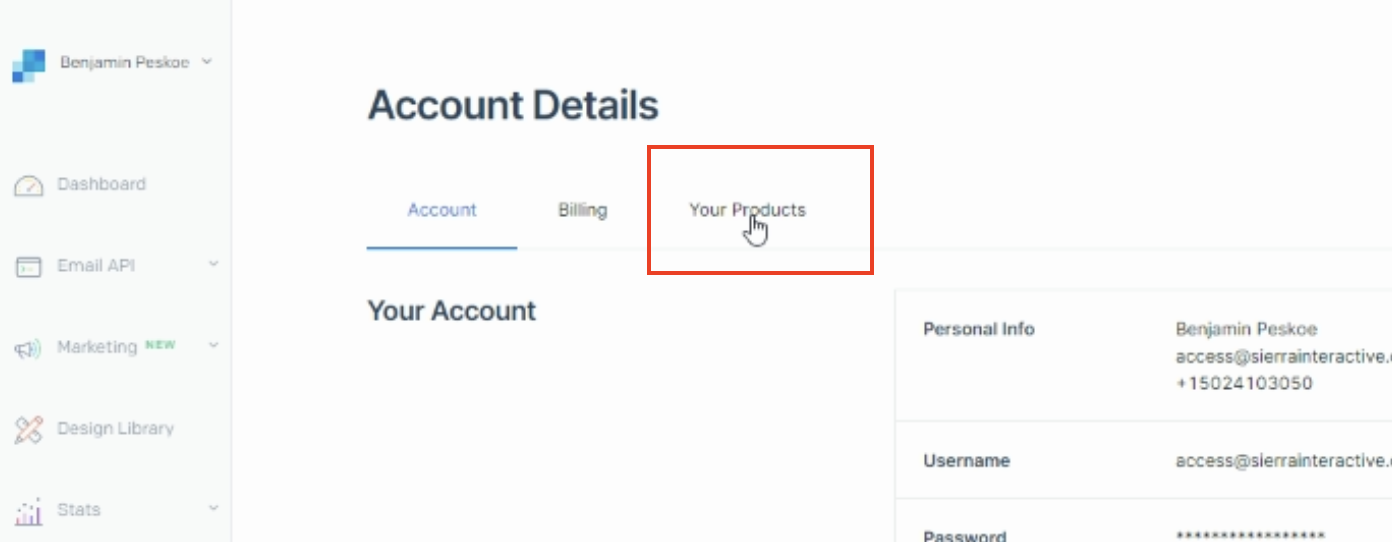
9. Now you will want to select billing from the top row of available options and ensure that you have a payment method added and that it's correct, as required for the next step.

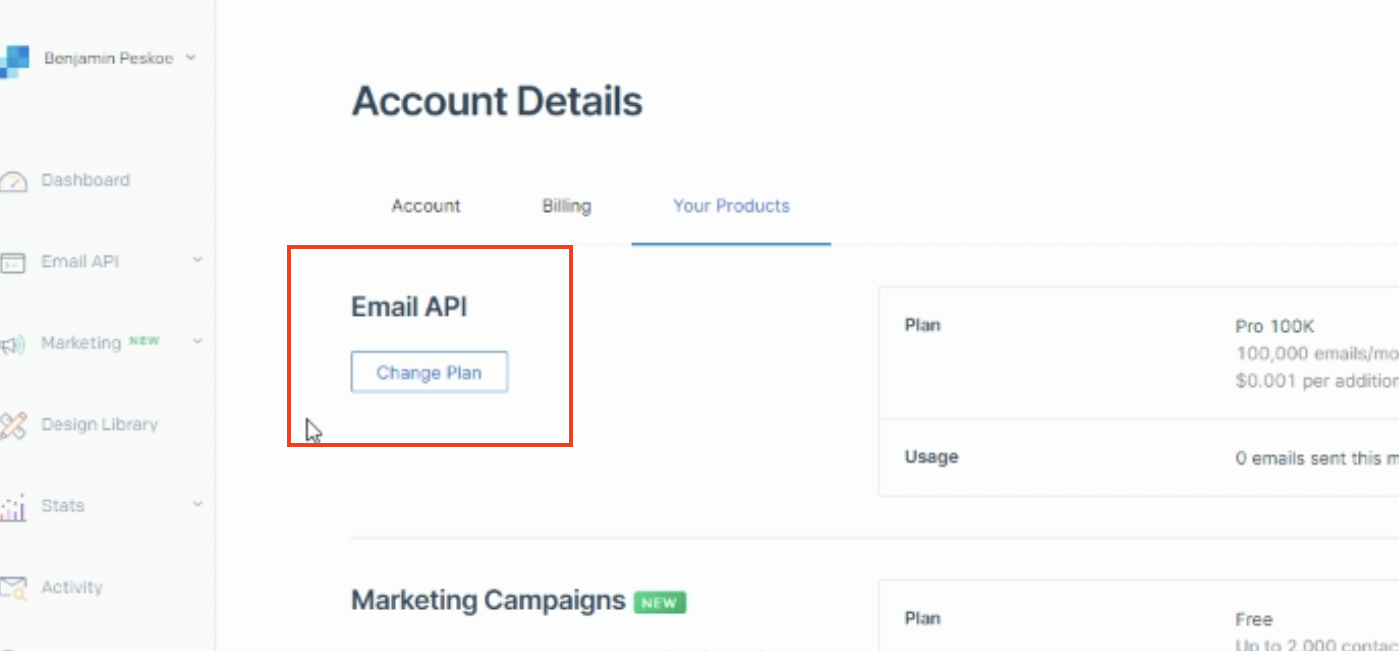
10. Now select “Your products”, next to Billing.
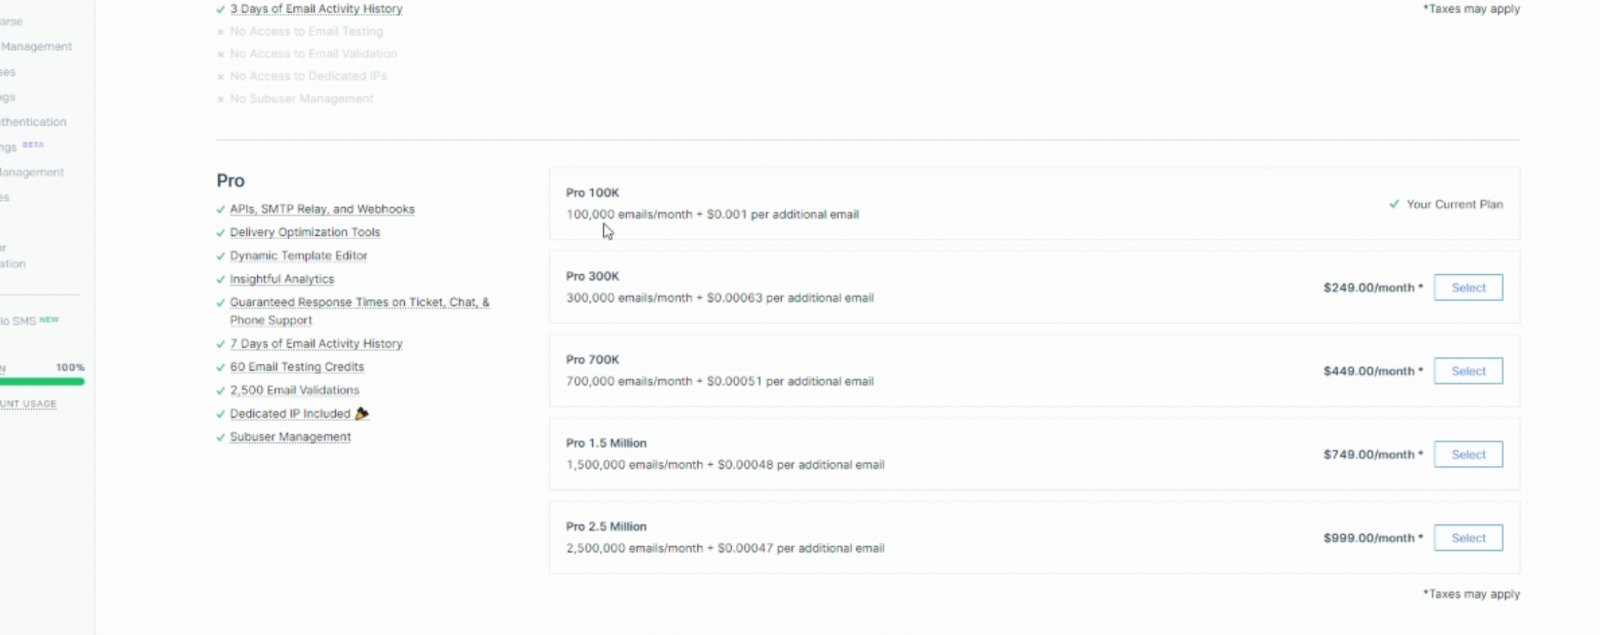
11. Now select “Change Plan” from the options as seen below.
12. Now scroll down until you see the Pro 100K Plan option. This plan is recommended due to the dedicated IP, which allows you to warm up and use your own dedicated IP server rather than sharing it with another party.
If you have any questions, reach out support@ggms.com